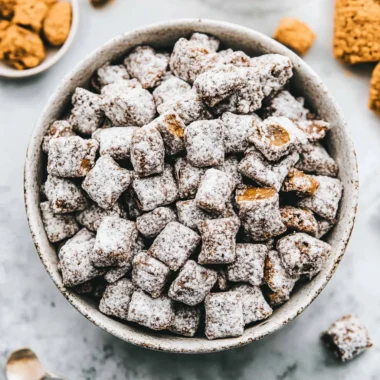
Imagine walking into a room filled with the sweet aroma of chocolate and vanilla, your eyes drawn to colorful, bite-sized delights on a stick—yes, cake pops! These little spheres of joy are not only a treat for the taste buds but also a feast for the eyes, making them an irresistible addition to any celebration or gathering. The moment you take a bite, the soft, crumbled cake melts in your mouth, perfectly complemented by a rich chocolate coating that leaves you craving more.
I remember the first time I made cake pops for my friend’s birthday party; it was a delightful disaster! As I attempted to dip them in chocolate, I ended up with more frosting on my hands than on the actual pops. But those playful mishaps turned into laughter-filled memories as everyone enjoyed these delectable morsels together. Whether you’re hosting a birthday bash or simply want to indulge in something sweet, cake pops are the perfect treat that brings joy and deliciousness to every occasion.
Why Will You Keep Making Cake Pops?
Deliciously versatile, these Cake Pops can be made with any flavor of cake mix, allowing you to customize them for every occasion. Quick prep time of just 30 minutes means you can whip up a batch for last-minute celebrations. Irresistibly cute, they are perfect party treats that appeal to both kids and adults. Easy to decorate with sprinkles, they add a festive touch to any dessert table. Plus, who can resist the combination of moist cake and rich chocolate coating?
Cake Pops Ingredient List
- For the Cake Base
- 1 box cake mix (any flavor) – Choose your favorite flavor to make these Cake Pops uniquely yours.
- 1 cup water – This helps to hydrate the cake mix for a moist texture.
- 1/2 cup vegetable oil – Adds richness and keeps the cake tender.
- 3 large eggs – Essential for binding the ingredients together and adding structure.
- For the Coating
- 2 cups chocolate chips (for melting) – Use high-quality chocolate for a smooth, delicious coating.
- 1 tablespoon shortening (to thin the chocolate) – Helps achieve a glossy finish when melting the chocolate.
- For Decoration
- 1 cup sprinkles (optional) – Add some fun and color to your Cake Pops with your favorite sprinkles!
Step-by-Step Cake Pops
1. Preheat the oven to 350°F (175°C). Prepare your chosen cake mix according to package instructions, combining it with 1 cup of water, 1/2 cup of vegetable oil, and 3 large eggs for a delicious base.
2. Pour the batter into a greased baking sheet and bake for 25-30 minutes. Keep an eye on it; when a toothpick comes out clean, you know it’s ready!
3. Cool the cake completely before crumbling it into a large mixing bowl. This is an important step to ensure your cake pops have the right texture.
Form Cake Pops:
4. Add frosting to the crumbled cake, mixing until well combined. The mixture should be moist but not overly wet—think of cookie dough consistency!
5. Scoop out small portions and roll them into balls, about 1 inch in diameter. This is where the fun begins—get creative with shapes if you’re feeling adventurous!
6. Insert a cake pop stick into each ball and place them on a baking sheet lined with parchment paper. Freeze for about 15 minutes to set; this helps keep them firm during coating.
Coat the Cake Pops:
7. Melt the chocolate chips and shortening in the microwave in 30-second intervals, stirring until smooth and creamy. This will give your cake pops that irresistible chocolate finish.
8. Dip each cake pop into the melted chocolate, allowing excess to drip off for an even layer. Roll in sprinkles if desired for an extra festive touch!
9. Place the coated cake pops upright in a styrofoam block to set completely. Let them cool until firm—your patience will pay off!
Optional: Roll in crushed nuts or drizzle with white chocolate for added flair.
Exact quantities are listed in the recipe card below.
Expert Tips
- Cake Crumbling: Ensure the cake is completely cool before crumbling; warm cake can lead to a gooey mixture that’s hard to shape into perfect Cake Pops.
- Frosting Balance: Use just the right amount of frosting. Too much will make the mixture soggy, while too little won’t help the pops hold together.
- Chill Time: Don’t skip freezing the formed cake balls. Chilling helps them maintain their shape when dipped in chocolate, preventing any drooping.
- Chocolate Consistency: If your melted chocolate is too thick, add an extra touch of shortening to achieve that smooth coating essential for beautiful Cake Pops.
- Sprinkle Timing: Roll your cake pops in sprinkles immediately after coating. This ensures they stick well to the chocolate before it sets.
How to Store and Freeze Cake Pops

- Room Temperature: Keep your cake pops in an airtight container for up to 3 days. This ensures they stay fresh and delicious without drying out.
- Fridge: For longer storage, place cake pops in the fridge for up to a week. Use a sealed container to prevent them from absorbing odors from other foods.
- Freezer: You can freeze cake pops for up to 3 months. Wrap each pop individually in plastic wrap and place them in a freezer-safe bag or container.
- Reheating: Thaw cake pops in the fridge overnight before enjoying. Avoid using the microwave, as it can make the chocolate coating unevenly melted.
Cake Pops Your Way
Feel free to let your creativity shine by customizing these delightful treats to suit your taste and occasion!
- Gluten-Free: Substitute the cake mix with a gluten-free blend for a deliciously inclusive treat. Your guests won’t even notice the difference!
- Vegan: Use a plant-based cake mix and replace eggs with flaxseed meal mixed with water. The result? A moist, cruelty-free indulgence that everyone will love.
- Chocolate Lovers: Opt for chocolate cake mix and add mini chocolate chips to the batter before baking. This rich twist creates an ultra-chocolatey flavor explosion in every bite.
- Citrus Burst: Choose lemon or orange cake mix and add zest from one fruit to the batter. This brightens up the flavor profile for a refreshing surprise!
- Nutty Crunch: Mix in 1/2 cup of finely chopped nuts like walnuts or pecans into the batter. They add lovely texture and a delightful nutty flavor that complements the sweetness.
- Spicy Kick: Incorporate 1 teaspoon of cinnamon or a pinch of cayenne pepper into your cake mix for a warm, spicy contrast to the chocolate coating. It’s an unexpected delight!
- Fruit Infusion: Fold in 1/2 cup of pureed fruit, like strawberries or bananas, into the batter for added moisture and natural sweetness. It’s a fruity twist that elevates your cake pops!
Make Ahead Options
When it comes to hosting a party, having your delicious cake pops prepped in advance can save you time and stress. Start by preparing the cake base using 1 box of cake mix (any flavor), 1 cup of water, 1/2 cup of vegetable oil, and 3 large eggs—this step can be done up to 24 hours ahead. Bake and cool the cake, then crumble it into a bowl. You can even form the cake balls and freeze them for up to 3 days before coating. Melt the chocolate chips (2 cups) with 1 tablespoon of shortening just before serving; this ensures a smooth coating. If you’re using sprinkles for decoration, have those ready to go as well! With these make-ahead tips, your cake pops will be fresh and festive when it’s time to celebrate!
Cake Pops Recipe FAQs
What type of cake mix can I use for the cake pops?
You can use any flavor of cake mix that you love! Classic choices like vanilla or chocolate are always a hit, but feel free to experiment with fun flavors like red velvet or lemon. The key is to choose a cake mix that you and your guests will enjoy.
How should I store leftover cake pops?
To keep your delicious cake pops fresh, store them in an airtight container at room temperature for up to 3 days. If you need to store them longer, consider refrigerating them for up to a week. Just remember to let them come back to room temperature before serving for the best taste!
Can I freeze my cake pops?
Absolutely! You can freeze your cake pops for up to 2 months. To do this, place them in a single layer on a baking sheet and freeze until solid. Once frozen, transfer them into a freezer-safe container. When you’re ready to enjoy, thaw them in the fridge overnight before serving.
What if my chocolate coating isn’t smooth?
If your melted chocolate appears thick or clumpy, it may not be thin enough for dipping. Adding an extra 1/2 tablespoon of shortening or vegetable oil can help achieve that smooth consistency you’re looking for. Remember to melt in 30-second intervals and stir well after each round!
How many servings does this recipe yield?
This delightful recipe yields approximately 4 servings, with each serving containing about 150 calories. If you’re planning for a party or gathering, consider doubling or tripling the recipe—cake pops are sure to be the star of the show!
Is there a way to make these cake pops healthier?
Definitely! You can substitute the vegetable oil with applesauce in equal amounts for lower fat content. Additionally, consider using dark chocolate chips instead of milk chocolate for a healthier coating option. You could also reduce the amount of frosting used in the mixture—just ensure your cake crumbs remain moist enough to hold their shape!

Cake Pops
Ingredients
Method
- Preheat the oven to 350°F (175°C). Prepare the cake mix according to package instructions using water, oil, and eggs.
- Pour the batter into a greased baking sheet and bake for 25-30 minutes or until a toothpick comes out clean.
- Allow the cake to cool completely before crumbling it into a large mixing bowl.
- Add frosting to the crumbled cake, mixing until well combined. The mixture should be moist but not overly wet.
- Scoop out small portions and roll them into balls, about 1 inch in diameter.
- Insert a cake pop stick into each ball and place them on a baking sheet lined with parchment paper. Freeze for about 15 minutes to set.
- Melt the chocolate chips and shortening in the microwave in 30-second intervals, stirring until smooth.
- Dip each cake pop into the melted chocolate, allowing excess to drip off. Roll in sprinkles if desired.
- Place the coated cake pops upright in a styrofoam block to set.